2009/12/24

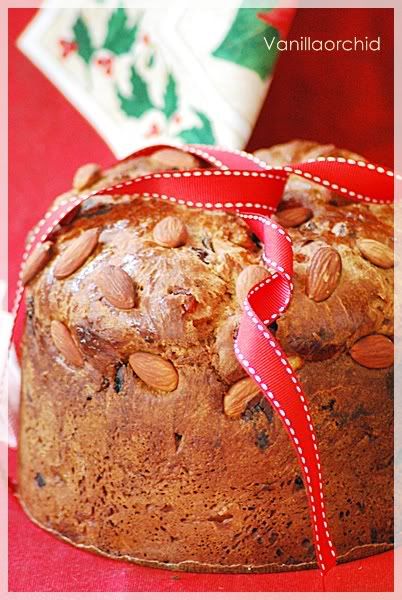
Panettone .... Merry Christmas

Photobucket


Last year I tried to make Panettone, Italian traditional Christmas & New Year cake but I failed.


This year, I do not want to give up even it's easier to buy from the shop but I just really want to try again ^O^


Photobucket


Fortunately I found the simple recipe on GoodFood magazine, Jan'10 and I immediately went to the kitchen as I was eager to make it.

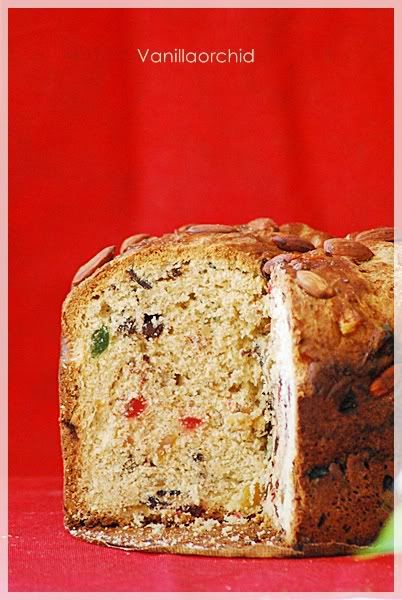
It's not complicated and the result is quite close to the one we can get from the shop except the one from shop is softer and made with less ingredients.

Photobucket

Modified from GoodFood

500 g. flour
14 g. dried yeast
1 tsp salt
100 g. golden caster sugar
200 ml. milk
3 eggs
1 vanilla pod
200 g. butter, softened
125 g. raisins
120 g. mix dried fruits (orange candy peel, dried apricot, dried fig, green & red cherries glace)
85 g. chocolate (dark & white chopped into chunks)

To finish

1 egg lightly beaten
some whole almonds

1. Mix briefly flour, yeast and salt into the food processor fitted with a dough blade.

2. Add the sugar and mix again.

3. Warm the milk just warm and in a separate bowl, beat the eggs with the vanilla bean.

4. Add both the milk and eggs to the dry ingredients and mix to soft dough then leave in the warm place until doubled in size, about 1 hrs.

5. Put soft butter into the dough and pulse until incorporated, leave for another 1 hour to rise again.

6. Add raisins, candied peel, dried fruits and chocolates to the bowl then pulse to mix evenly.

8. Tip the dough out onto a lightly floured surface and knead briefly to shape into a ball.

9. The dough is very soft, better to flour you hands well before handing it and work quickly.

10. Drop the dough into a tin (I used the Panettone tin) and leave to rise for 30 mins.

11. Heat the oven to 180° C/ 160° C fan.

12. Brush top of the dough with beaten egg and spring the almonds.

13. Bake for 40-50 mins until the well risen and deep golden brown.

Merry Christmas ^O^

2009/10/30

Rustic country loaf

Photobucket


Making bread at home is kind of joyful ... your house will full of the scent of fresh bread and once they just came out from the oven, it's fantastic.

In autumn and winter, I normally make bread twice a month and every time I bring some to my mother-in-law as she loves my home made bread. But I did not succeed in making this kind of bread before. I normally buy it from the shop.


Photobucket


Finally, I found this recipe and I can make it.... I'm really happy....I love it a lot :)


This bread had a crispy and authentic texture which I can eat it without jam or nutella!!


Photobucket


Recipe from BBC GoodFood, November'09

Starter

225 g. bread flour
1 tsp fast-action dried yeast
200 ml. warm water

Bread

500 g. bread flour (plus extra for kneading and dusting)
2 tsp fast-action dried yeast
2 tsp salt
150 ml. warm water
75 ml. plain yogurt
oil, for greasing

1. Make the starter by mixing flour, yeast and warm water; use a wooden spoon to mix together.

2. Cover the bowl with oiled cling film and leave in the fridge overnight.

3. Make the bread by putting the flour along with salt and yeast. (do not put the yeast directly to the salt because the yeast could not work well)


4. Pour warm water and the yogurt into the starter mixture, stir well then pour this into the bowl with the flour.

5. Using the wooden spoon to bring the mixture together into a ball. (add another 50 ml. warm water if the dough feels tight.

6. Knead the dough onto a surface lightly dusted with flour for about 10 minutes or until the dough feel slightly springy when touched and have a smooth surface. (you can knead the dough for about 5 minutes in a food processor with a dough attachment.

7. Lightly oil a large bowl and place the dough inside then cover with oiled cling film.

8. Leave in the warm place for about 45 minutes to about 1 1/2 hrs or the dough nearly trebled in size.

9. Knead a couple of times on the floured surface until smooth and the air has been knocked out. Shape the dough into a round ball and place of the baking paper sheet or silicone mat.

10. Cover with the kitchen towel and leave in the warm place for about 1 hr or until doubled in size.

11. Heat the oven to 230°C/210°C fan.

12. Place a roasting tin on the bottom shelf of the oven and fill with boiling water from the kettle.

13. Leave in the oven for 10 minutes so it gets steamy.

14. If you dough has spread out, carefully tuck the ends under to make a neat ball then use the knife to make three slashes across the bread before dusting with the flour.

15. Place the baking sheet on the middle shelf of the oven (I used to place on the top of the oven, but after baking the bread stuck in the top) and bake for 20 mins.

16. Turn the heat down to 220°C/200°C fan bake for another 25 mins. then take out of the oven.

17. Tap the bottom of the loaf; it should sound hollow if not return to the oven for another 10 mins.

18. Leave to cool on a wire rack.

Photobucket

Enjoy ^O^

2009/10/20

He made pudd (ing).... I took pic (tures) : CHOCOLATE PUDDING

Photobucket

My husband is the best one making chocolate pudding in his family by using the instant one. I have tried to convince him so many times to make it from real ingredient!!

Finally, he was convinced!

Photobucket

He has made it three times already but the first time he made it, he somehow complained that it was complicated and there were a lot of cleaning work! But, after the 1st bite he said it was very delicious!!!

The last time he made once we invited his mom and his brother for dinner and yessss they loved it a lot.


Photobucket


I’m really happy that my husband starts liking to make the real chocolate pudding and every time he wants to eat it he can do it himself!!

Modified from Tartine book

Whole milk 425 ml
Heavy cream 155 ml
Cornstarch 30 g
Sugar 140 g
Cacao powder 3 tbsp
Medium egg 4
Salt 1/4 tsp
Dark chocolate chopped (85%) 90 g
Biscuits

Combine milk and heavy cream in a saucepan and heat to just under a boil.

Combine the cornstarch and sugar in a mixing bowl and sift in the cacao powder.

In another mixing bowl, whisk the eggs with the salt until blended then add to the sugar mixture and whisk until well combined.

Slowly add half of the hot milk mixture to the egg mixture while whisking constantly.

Put the egg mixture back into the pan with the rest of the milk mixture and cook over medium heat, whisking constantly until the mixture has thickened and registers 208°F.

Pour the cream through the sieve and add the chocolate and let it melt.

When the chocolate has melted, blend with a blender until no lump.

Pour the cream to the prepared individual cup just half bowl, then put one biscuit and pour other cream until reach the top of the cup.

Let it cool and serve at room temperature. (I like to keep it in the fridge over the night and eat it as I feel the cream is stickier)

Photobucket

Enjoy ^O^

2009/10/04

Macaron

Photobucket


I seldom make macaron because we do not fancy it too much as it's too sweet for us. I used to make it from the recipe which needs to let the top of the macaron to be dry before baking.


Photobucket


But, I do want to try to make this from P'Thip, Bonbini blog; I'm convinced by her recipe because it can bake immediately once we piped the batter.


The 1st time I made, it did not turn out as macaron, so I tried again and this time they turned out better for the second bat.


Photobucket


I tried for the 3rd time; and finally I was satisfied.


Thank you so much ka P'thip for listening and for your help ^O^

Please check here for her recipe http://www.namthip.com/2009/06/i-heart-u-french-macaroon.html.

2009/09/25

Hello Kitty & Brush Roll

Photobucket


I love Hello Kitty although I'm not a teenager any longer hehehe... and one of my friends, Act, loves it too, and maybe more than me!!!


Both of us have so many stuff from Helly Kitty collection, I can say that we are Hello Kitty fan club ^O^


Photobucket


I had a chance to buy this fabric from Japan, when it arrived I could not let it lay in my cabinet!! I decided to make these for her birthday.


Photobucket


As she always travels, so I made 2 sizes, the big one for keeping her cosmetic stuff in her luggage, and the small one for her handbag.


Photobucket


The small one can keep enough things inside.


Photobucket


She just received them today and I'm really happy that she loves and adores them a lot.


Photobucket


I also made her this roll to keep her cosmetic brushes.


Photobucket


Before, I wanted to make with some linen but as she likes the colourful things I preferred to choose these colourful fabrics.


Photobucket


I'm happy to know that she already put all the brushes she has in this roll!!!

2009/09/19

Crème Brulee Custard Green Tea Chiffon Cake

Photobucket


Chicken farm baker’s host for this month is J-Nap and the idea is Green Tea Dessert.

Once I knew this, I immediately thought about custard because I lately notice that I like having dessert with cream custard!!!


Photobucket


I have made this custard chiffon cake with the recipe from J'Lee blog and it's very delicious. So, I decided to make this again in green tea version.


Photobucket

I adjusted some ingredients:

Caramel

50 g. sugar

Custard

110 g. sugar
280 g. condense milk (the one without sugar)
4 egg yolks
1 vanilla stick

Green tea chiffon cake

1° part

90 g. flour
10 g. matcha green tea
1 1/4 tsp baking powder
50 g. sugar
3 tbsp vegetable oil
95 g. water
2 egg yolks
1 vanilla stick

2° part

3 egg whites
1/2 tsp cream of tartar
50 g. sugar

Preheat the oven to 175° C.

Caramel

Put the sugar in the prepared pan and cook over low heat.

When the sugar melts and turns to dark colour, spread it all over the pan.

Leave it to cold then you will see the crack on the surface.


Custard

Mix together all the custard ingredients.


Green tea chiffon cake

1° part

Sift together the flour, baking powder and green tea into a large bowl.


Add the rest of ingredients and whisk quickly for about 1 minutes until smooth.


2° part

Put the egg whites and cream of tartar in a large mixing bowl.

Whisk on the medium speed until frothy.

Slowly add the sugar and beat until the whites hold firm, shiny peaks.

Add one-third of the white onto the yolk mixture and fold in gently to lighten the batter.

Gently fold in the remaining whites just until combined.

Put the prepared pan with caramel on a big pan filled with water.

Put the custard mixture in the pan following with the green tea batter.

Bake for about 45 minutes or until the cake slightly disconnects from the pan.

Leave the pan cool shortly about 1 minute. (do not leave it longer because the caramel will stick to the pan)

Invert the cake, the caramel custard will be on the top.

Sprinkle the sugar on the top of the custard and using torch for making crème brulee.

2009/09/13

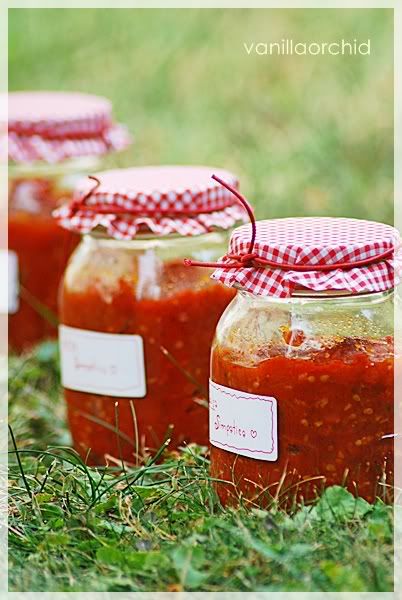
Tomato sauce

Normally I make the tomato sauce around the end of August or the beginning of September. But this year the guy at the veggies shop told me that I'm already late for making it, as the summer began earlier and it's hotter than last year.

So, I paid for the tomatoes a little bit higher than last year. It was about 8 euro for 10 kg instead of 6 euro.


Photobucket


If you ask me whether it's worth to make it myself, I can say this: talking about the cost, of course the one we made is more expensive than buying. But talking about how delicious and healthful, it’s absolutely worth!!!!


Photobucket


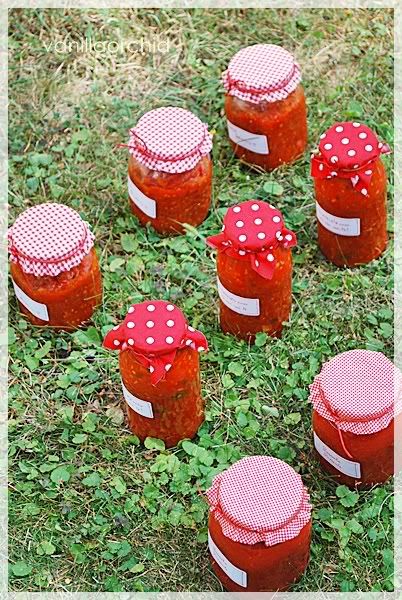
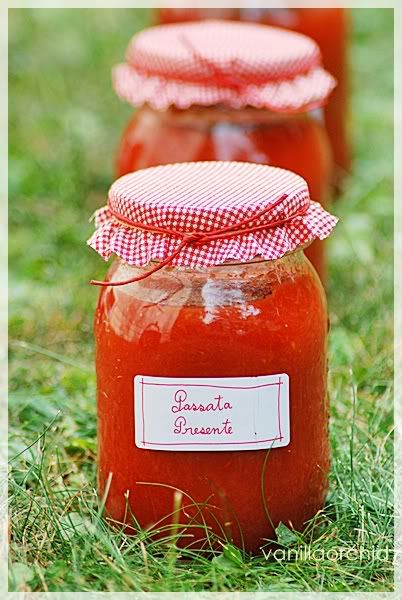
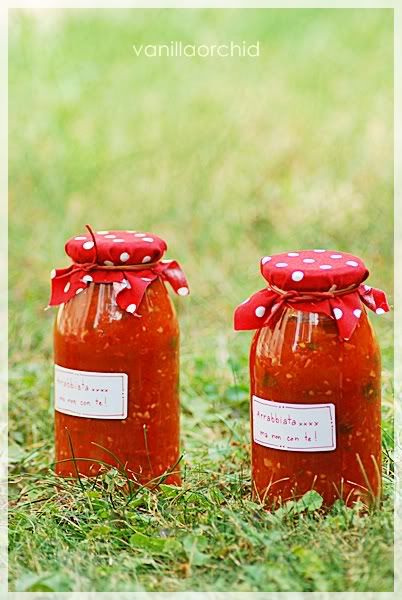
I made 3 kinds of tomato sauce:


- tomato paste (the one I have made for the past 3 years)
- arrabbiata sauce, spicy tomato sauce
- simple sauce


Photobucket


Tomato paste


I got the idea for arrabbiata and simple sauce from Jamie's Dinner Cookbook.


Photobucket


Arrabbiata sauce


5 kg plum tomatoes, boiled and peeled
5 tbsp of extra virgin olive oil
8 cloves of garlic, chopped
2 handfuls of basil leaves, chopped
12 fresh red chillies (pierce the chillies with a knife so they don't explode when frying)
salt & black pepper
a pinch of sugar
2 tbsp of red wine vinegar

1. Fry the garlic in olive oil with chopped basil leaves and fresh chillies.

2. Add the peeled tomato (try to get hold of the tomato and leave the tomato whole)

3. Season with salt and ground black pepper.

4. Simmer for about 30 minutes then remove the chillies.

5. Break the tomato with a spoon (you can use the blender if you like) and carefully season again with salt and pepper.

6. Add the red wine vinegar to give a little twang.

* the seeds can be a little bit bitter, if you chopped the tomato straight away the sauce won’t be as sweet as it should be.


Photobucket


Simple sauce


5 kg. plum tomatoes, boiled and peeled
5 tbsp of extra virgin olive oil
8 cloves of garlic, chopped
2 handfuls of basil leaves, chopped
2 fresh red chillies (pierce the chillies with a knife so they don't explode when frying)
salt & black pepper
a pinch of sugar

Follow the same steps as for arrabbiata sauce.

For sterilization:

1. Fill the sauce in the jar and close with the new lid.

2. Put the kitchen towel in the bottom of a big pot.

3. Put the jars inside the pot and wrap each jar with kitchen towels to avoid the jars to touch each other during the sterilization process.

4. Fill the pot with water until the water covers the jars for about 10 cm.

5. Once the water boils, keep boiling for 40 minutes more.

6. Leave the jars to cold in the pot, you will hear the "click" sound of the lids going down; it means the sterilization process is finished.

• If everything went through the process, you can be sure that the sauce will last for at least 2 years.

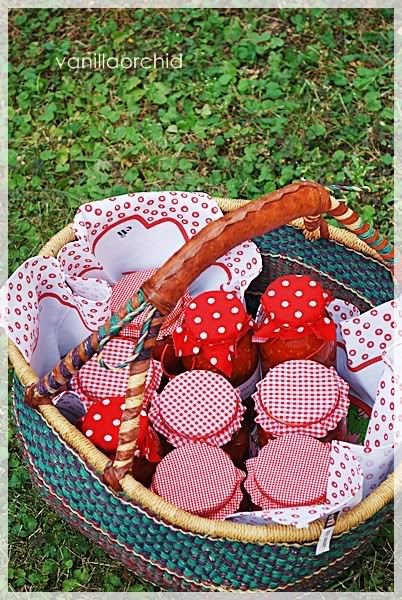
• You can make this as present by making a good packaging with some cute handwriting word.

2009/09/02

My cute little purses

Just last month that I had a chance to make these little purses;

One is for my friend who gave me some Japanese fabric as a present. So, I thought to make a nice hand made present for her; when I asked her what does she like to have...she told me that she would be happy to have a tissue case.


Photobucket


Just thinking about a tissue case, I had an idea of making it along with a purse. Searching around, I finally made up my mind making this one.

Photobucket


As I know that her favourite colour is blue, therefore I went to look in my cabinet where I keep all the fabrics and after jumping my head inside for an age (hahahaha), I found those lovely blue ones!!!


Photobucket


This one I made for my friend Pook's sister to thank her for her hospitality during my stay in London last week.

Photobucket


Knowing that she loves the sweet and romantic things, this is why I chose this beautiful rose fabric.

Photobucket

It fits quite well for some beauty or cosmetic things.

Photobucket

Hope they will love my presents as well as I do.

2009/05/15

Cheesy garlic bread


Normally I do not like eating garlic bread due to the strong flavour of garlic but when I saw this recipe, I told myself that it's very interesting because of cheese!! I like cheeseeeeeee ^O^


I told my husband that I want to make this ... I saw a question mark on his face as he knows that I am not a kind of garlic bread lover. Anyway, the result is more than I expected! I love it!


The recipe is adapted from BBC GoodFood

500 g. bread flour
7 g. yeast
1 tsp salt
300 warm water
2 tbsp olive oil
1 tbsp honey
2 garlic cloves, minced
25 g. soft butter
140 cheddar, grated
handful thyme leaves

1. Mix the flour, yeast and salt in the large bowl.

2. Mix warm water with oil and honey in other bowl.

3. Pour into the dry mixer and stir all the time to make soft dough.

4. Put the dough onto a lightly floured surface and knead it until the dough is
smooth.

5. Stretch it to fit the roll tin.

6. Mix the garlic with butter then spread over the dough.

7. Sprinkle over the cheese and thyme.

8. Over with the cling film and leave in a warm place to rise for 40 minutes.

9. Preheat the oven to 200° C.

10. Bake for 30 minutes or until golden and risen.

11. Leave it to cool for 10 minutes and then serve.

Buon appetito ^O^

2009/04/12

Happy Easter ^o^


Finally, Easter is coming...it means Spring for me ^O^


I decided to made chocolate gianduja for this holiday.


150 g. dark chocolate
60 g. ground hazelnut
30 g. icing sugar

1) Sift ground hazelnut and icing sugar together.

2) Tempering the chocolate, I use seeding technique.

3) Add ground hazelnut into the chocolate.

4) Mix together and pour in the shell.

5) After the chocolate has set, move it from the shell.

Happy Easter ^O^

2009/03/15

Banana & Stawberry Mini Muffins


Finally, it's time for strawberry! There are lots of strawberries in the market but the price is still somehow expensive and the taste is not sweet as it should be. My hubby told me that it's too early for the having strawberry as dessert. Normally we like having them with some sugar and a little bit lemon juice mix together.

Last week, I saw some red and big strawberries in the market so I did not hesitate to take them with me…..hehehe.


And yes, my hubby is right!! They are not enough sweet to eat them fresh, so I thought to use them in making muffin.

I have never make dessert with strawberry and banana together, I am curious how it will be and it's really perfect!


Adapted from Banana and Strawberry Muffins from Leiths Baking Bible

280 g strawberries
100 g ripe banana
2 eggs, beaten
85 g butter, melted and cooled
140 g sugar
225 g. self-raising flour
1/2 ts bicarbonate of soda
demerara sugar, for sprinkling

1. Het the oven to 190° C

2. Wash and hull the strawberries, then cut in dice.

3. Mash the 70 g strawberries and banana.

4. Stir in sugar, butter and eggs.

5. Sift the flour and bicarbonate of soda over the wet mixture and fold in (no more than 20 strokes) Overfolding will make the muffins tough.

6. Stir in the diced strawberries.

7. Put in the mini muffin cups and sprinkle with demerara sugar.

8. Bake for 20-25 mins. or until a tooth stick inserted in the centre comes out with out any batter sticking to it.

9. Serve warm or at room temperature.

2009/02/28

Penne with prawns, cream & tomato


We really love having pasta for lunch; we usually have pastasciutta (cooked pasta) one meal a day. I love trying to cook pasta in new recipe which normally I learn from my mother in-law and my sister in-law.


This time I tried the recipe from the book "Apple for Jam" but I modified a little bit just the way we like.

40 grams butter
200 grams tinned tomatoes
200 grams penne
2 tsp olive oil
400 grams raw prawns, peeled and deveined
2 garlic cloves, peeled and squashed a bit
2 tbs Martini
3 tbs cream
some chopped parsley
a little bit ground chilli
salt & pepper
ground parmesan cheese

1) Melt half butter in small pan and when it's sizzling, add the tomatoes and season with salt and pepper.

2) Cook over medium heat for 10 mins.

3) Cook the pasta in boiling salted with a few drops of oil.

4) Heat a large non-stick pan over high heat.

5) Add oil and the rest of butter, when it's sizzling add prawns and garlic.

6) Cook the prawns over the highest heat until they are quite bright undersides are golden and crusty in places.

7) When they are cooked, scatter with salt add the martini and cook until it evaporates.

8) Add the tomato sauce to the prawns then cream and chopped parsley.

9) Heat until just bubbling then add the cooked pasta and toss.

10) Serve with some ground parmesan cheese.

This dish has become one of our favourite pasta sauces; it's very easy and quick to prepare it.

Enjoy!

2009/01/23

Raspberry truffles


This is the 1st time for me to do the chocolate truffles..it's kind of exciting! I really enjoyed making them! It's fun and I cannot stop myself licking the melt chocolate and the ganache filling!! They're absolutely tasty :)


I decided to make this because we love the fruit liqueur more than others and it's also easy to find them somewhere in our house.


Raspberry truffles

Shells (15 truffles)

White chocolate 160 grams

Ganach

Heavy cream 25 grams
Glucose syrup 8 grams
White chocolate, chopped 66 grams
Raspberry liqueur 8 grams

Raspberry jam

Prepare the shells and get them ready to fill the ganache.


For the ganache

1. Combine the heavy cream and glucose syrup in a saucepan and bring to boil.

2. Pour the hot cream mixture over the chopped chocolate and let it sit for 1 min. to allow the chocolate to melt.

3. Use the spoon to stir the mixture in small circles in the center of the bowl until it emulsifies.

4. Stir in larger circles till all the chocolate has melted. If necessary, place the ganache over the warm water (not excessing 34° C) to melt the chocolate.

5. Pour in the liqueur and stir the mixture until it's homogeneous.

6. Pour the ganache into the bowl, place plastic wrap directly on the surface of the ganache. Allow the ganache to rest at room temerature until it reaches 25° C or around 20 mins.

7. Pipe the ganache into the shells to fill only halfway and refrigerate the shells for 10 mins to firm the ganache.

8. Pipe the raspberry jam in the center on top of the ganache filling.

9. Fill the shells with remaining ganache almost to the top of the shells.

10. Allow the ganache to crystallize at room temperature for 1 hour.

11. Seal the shell with tempered white chocolate and rest at room temperature until all set.

P.S Thank you P'Thip (Bonbini) for her tips in making chocolate.

Enjoy!